Workshop Instructions
Individual module files making up the workshop instructions can use either Markdown or AsciiDoc markup formats when using the classic renderer. The extension used on the file should be .md or .adoc, corresponding to which formatting markup style you want to use. In the case of the hugo renderer, only Markdown files can be used. As with when Hugo is used separately, pages can be represented by a single file with .md extension, or a page bundle, which is a directory with name corresponding to the page, with an index.md file contained within the directory.
If using images with pages, with the classic renderer the images can be placed in the same location as the Markdown or AsciiDoc files. When using the hugo renderer, if using single files with .md extension, the image files need to be placed in the workshop/static directory. If using a page bundle with the hugo renderer, image files can also be placed in the page bundle directory if the image is only required for that page.
Annotation of executable commands
In conjunction with the standard Markdown and AsciiDoc, additional annotations can be applied to code blocks. The annotations are used to indicate that a user can click on the code block and have it copied to the terminal and executed.
If using Markdown, to annotate a code block so that it will be copied to the terminal and executed, use:
```execute
echo "Execute command."
```
When you click on the code block the command will be executed in the first terminal of the workshop dashboard.
The terminal session the command is directed to will remain selected such that any subsequent text manually entered will be directed to that terminal without needing to select the terminal first.
If using AsciiDoc, you would instead use the role annotation in an existing code block:
[source,bash,role=execute]
----
echo "Execute command."
----
When the workshop dashboard is configured to display multiple terminals, you can qualify which terminal the command should be executed in by adding a suffix to the execute annotation. For the first terminal use execute-1, for the second terminal execute-2, and for the third terminal execute-3.
```execute-1
echo "Execute command."
```

```execute-2
echo "Execute command."
```
If you want to be able to execute a command in all terminal sessions on the terminals tab of the dashboard, you can use execute-all.
```execute-all
clear
```
In this instance the first terminal session will be left selected after the command is executed.
In most cases, a command you execute would complete straight away. If you need to run a command that never returns, with the user needing to interrupt it to stop it, you can use the special string <ctrl+c> in a subsequent code block.
```execute
<ctrl+c>
```
When the user clicks on this code block, the running command in the corresponding terminal will be interrupted.
Note that using the special string <ctrl+c> is deprecated and you should instead use the terminal:interrupt clickable action instead.
Annotation of text to be copied
Instead of executing a command, you wanted the content of the code block to be copied into the paste buffer, you can use:
```copy
echo "Text to copy."
```
After clicking on this code block, you could then paste the content into another window.
If you have a situation where the text being copied should be modified before use, you can denote this special case by using copy-and-edit instead of copy. The text will still be copied to the paste buffer, but will be displayed in the browser in a way to highlight that it needs to be changed before use.
```copy-and-edit
echo "Text to copy and edit."
```
For AsciiDoc, similar to execute, you can add the role of copy or copy-and-edit:
[source,bash,role=copy]
----
echo "Text to copy."
----

[source,bash,role=copy-and-edit]
----
echo "Text to copy and edit."
----
For copy only, if you prefer to mark an inline code section within a paragraph of text as copyable when clicked, you can append the special data variable reference {{copy}} immediately after the inline code block.
Text to ``copy``{{copy}}.
Extensible clickable actions
The means to annotate code blocks described above were the original methods used to indicate code blocks to be executed or copied when clicked. To support a growing number of clickable actions with different customizable purposes, annotation names were changed to being namespaced. The above annotations will still be supported, but the following are now recommended, with additional options available to customize the way the actions are presented.
For code execution, instead of:
```execute
echo "Execute command."
```
you can use:
```terminal:execute
command: echo "Execute command."
```
The contents of the code block is YAML. The executable command needs to be set as the command property. By default when clicked the command will be executed in terminal session 1. If you want to specify a different terminal session, you can set the session property.
```terminal:execute
command: echo "Execute command."
session: 1
```
To define a command when clicked that will execute in all terminal sessions on the terminals tab of the dashboard, you can also use:
```terminal:execute-all
command: echo "Execute command."
```
For terminal:execute or terminal:execute-all if you want to have the terminal cleared before the command is executed you can set the clear property to true.
```terminal:execute
command: echo "Execute command."
clear: true
```
This will clear the full terminal buffer and not just the displayed portion of the buffer.
Using this new form of clickable actions, the preferred method for indicating that a running command in a terminal session should be interrupted is by using:
```terminal:interrupt
session: 1
```
You can optionally specify the session property within the code block to indicate an alternate terminal session to session 1.
To have an interrupt sent to all terminals sessions on the terminals tab of the dashboard, you can use:
```terminal:interrupt-all
```
Where you want to enter input into a terminal but it isn’t a command, such as when a running command is prompting for input such as a password, to denote it as being input rather than a command, you can use:
```terminal:input
text: password
```
As for executing commands or interrupting a command, you can specify the session property to indicate a specific terminal to send it to if you don’t want to send it to terminal session 1.
```terminal:input
text: password
session: 1
```
When providing terminal input in this way, the text will by default still have a newline appended to the end, making it behave the same as using terminal:execute. If you do not want a newline appended automatically, set the endl property to false.
```terminal:input
text: input
endl: false
```
To clear a terminal session on the terminals tab of the dashboard, you can use:
```terminal:clear
session: 1
```
To clear all terminal sessions on the terminals tab of the dashboard, you can use:
```terminal:clear-all
```
These work by clearing the full terminal buffer and not just the displayed portion of the terminal buffer. It should not have any effect when an application is running in the terminal and it is using visual mode. If you want to only clear the displayed portion of the terminal buffer when a command prompt is displayed, you can instead use terminal:execute and run the clear command.
For all clickable actions above where input is directed at a specific terminal session, that terminal will remain selected so any text then manually entered will also be directed to that terminal.
For copying content to the paste buffer you can use:
```workshop:copy
text: echo "Text to copy."
```
or:
```workshop:copy-and-edit
text: echo "Text to copy and edit."
```
A benefit of using these over the original mechanism is that by using the appropriate YAML syntax, you can control whether a multi line string value is concatenated into one line, or whether line breaks are preserved, along with whether initial or terminating new lines are included. In the original mechanism the string was always trimmed before use.
By using the different forms above when appropriate, the code block when displayed can be annotated with a different message indicating what will happen.
The method for using AsciiDoc is similar, using the role for the name of the annotation and YAML as the content:
[source,bash,role=terminal:execute]
----
command: echo "Execute command."
----
Clickable actions for the dashboard
In addition to the clickable actions related to the terminal and copying of text to the paste buffer, additional actions are available for controlling the dashboard and opening URL links.
To have the action when clicked open a URL in a new browser, you can use:
```dashboard:open-url
url: https://www.example.com/
```
In order to allow a user to click in the workshop content to display a specific dashboard tab if hidden, you can use:
```dashboard:open-dashboard
name: Terminal
```
Note that in the case of a dashboard tab embedding a terminal session, the terminal is not given focus. If you want to select a terminal session and ensure it has focus ready for entering text, you can use the dashboard:expose-terminal clickable action instead.
```dashboard:expose-terminal
session: 1
```
To create a new dashboard tab with a specific URL, you can use:
```dashboard:create-dashboard
name: Example
url: https://www.example.com/
```
To create a new dashboard tab with a new terminal session, you can use:
```dashboard:create-dashboard
name: Example
url: terminal:example
```
The value should be of the form terminal:<session>, where <session> is replaced with the name you want to give the terminal session. The terminal session name should be restricted to lower case letters, numbers and ‘-‘. You should avoid using numeric terminal session names such as “1”, “2” and “3” as these are use for the default terminal sessions.
To reload an existing dashboard, using whatever URL it is currently targetting, you can use:
```dashboard:reload-dashboard
name: Example
```
If the dashboard is for a terminal session there will be no effect unless the terminal session had been disconnected, in which case it will be reconnected.
To change the URL target of an existing dashboard, you can specify the new URL when reloading a dashboard:
```dashboard:reload-dashboard
name: Example
url: https://www.example.com/
```
If the specified dashboard does not exist, it will be created. This therefore can be used as an alternative to the clickable action for creating a dashboard which will not indicate an error if the dashboard already exists.
You cannot change the target of a dashboard which includes a terminal session.
If using the clickable actions to create or reload a dashboard, if necessary you can perform the action but avoid the dashboard tab being made the focus using:
```dashboard:reload-dashboard
name: Example
url: https://www.example.com/
focus: false
```
To delete a dashboard, you can use:
```dashboard:delete-dashboard
name: Example
```
You cannot delete dashboards corresponding to builtin applications provided by the workshop environment, such as the default terminals, console, editor or slides.
Deleting a custom dashboard including a terminal session will not destroy the underlying terminal session and it can be connected to again by creating a new custom dashboard for the same terminal session name.
Clickable actions for the editor
If the embedded editor is enabled, special actions are available which control the editor.
To open an existing file you can use:
```editor:open-file
file: ~/exercises/sample.txt
```
You can use ~/ or $HOME/ prefix to indicate the path relative to the home directory of the session. On opening the file, if you want the insertion point left on a specific line, provide the line property. Lines numbers start at 1.
```editor:open-file
file: ~/exercises/sample.txt
line: 1
```
To highlight certain lines of a file based on an exact string match, use:
```editor:select-matching-text
file: ~/exercises/sample.txt
text: "int main()"
```
The region of the match will be highlighted by default. If you want to highlight any number of lines before or after the line with the match, you can specify the before and after properties.
```editor:select-matching-text
file: ~/exercises/sample.txt
text: "int main()"
before: 1
after: 1
```
Setting both before and after to 0 will result in the complete line which matched being highlighted instead of any region within the line.
To match based on a regular expression, rather than an exact match, set isRegex to true.
```editor:select-matching-text
file: ~/exercises/sample.txt
text: "image: (.*)"
isRegex: true
```
When a regular expression is used, and subgroups are specified within the pattern, you can indicate which subgroup will be selected.
```editor:select-matching-text
file: ~/exercises/sample.txt
text: "image: (.*)"
isRegex: true
group: 1
```
Where there are multiple possible matches in a file and the one you want to match is not the first, you can set a range of lines to search.
```editor:select-matching-text
file: ~/exercises/sample.txt
text: "image: (.*)"
isRegex: true
start: 8
stop: 12
```
Absence of start means start at the beginning of the file. Absence of stop means stop at the end of the file. The line number given by stop is not included in the search.
For both an exact match and regular expression, the text to be matched must all be on one line. It is not possible to match on text which spans across lines.
To replace text within the file, first match it exactly or using a regular expression so it is marked as selected, then use:
```editor:replace-text-selection
file: ~/exercises/sample.txt
text: nginx:latest
```
To append lines to the end of a file, use:
```editor:append-lines-to-file
file: ~/exercises/sample.txt
text: |
    Lorem ipsum dolor sit amet, consectetur adipiscing elit, sed
    do eiusmod tempor incididunt ut labore et dolore magna aliqua.
```
If you use editor:append-to-lines-to-file and the file doesn’t exist it will be created for you. You can therefore use this to create new files.
To insert lines before a specified line in the file, use:
```editor:insert-lines-before-line
file: ~/exercises/sample.txt
line: 8
text: |
    Lorem ipsum dolor sit amet, consectetur adipiscing elit, sed
    do eiusmod tempor incididunt ut labore et dolore magna aliqua.
```
To insert lines after matching a line containing a specified string, use:
```editor:append-lines-after-match
file: ~/exercises/sample.txt
match: Lorem ipsum
text: |
    Lorem ipsum dolor sit amet, consectetur adipiscing elit, sed
    do eiusmod tempor incididunt ut labore et dolore magna aliqua.
```
Where the file contains YAML, to insert a new YAML value into an existing structure, use:
```editor:insert-value-into-yaml
file: ~/exercises/deployment.yaml
path: spec.template.spec.containers
value:
- name: nginx
  image: nginx:latest
```
To execute a registered VS code command, you can use:
```editor:execute-command
command: spring.initializr.maven-project
args:
- language: Java
  dependencies: [ "actuator", "webflux" ]
  artifactId: demo
  groupId: com.example
```
Clickable actions for file download
If file downloads are enabled, the files:download-file clickable action can be used.
```files:download-file
path: .kube/config
```
The action will trigger saving of the file to the local computer.
The name of the locally saved file will be the basename part of the path, that is, with leading directories removed. If you want the file saved locally under a different name, add the download property, setting it to the name of the local file. This local filename cannot include a directory path.
```files:download-file
path: .kube/config
download: kubeconfig-{{session_name}}
```
At the same time as being able to download the file you want to make it viewable in the browser as part of the workshop instructions, the preview property can be set to true. When this is done a preview of the file contents will be displayed in the code block part of the clickable action.
```files:download-file
path: .kube/config
download: kubeconfig-{{session_name}}
preview: true
```
It is recommended that the preview feature not be used for larger files.
If instead of downloading the file you want the contents of the file to be copied to the browser paste buffer, you can use the files:copy-file clickable action. The preview property can also be used with this action.
```files:copy-file
path: .kube/config
preview: true
```
For both the files:download-file and files:copy-file clickable actions, the source path for the file would by default be relative to the home directory of the workshop user. If however the directory made visible via the files download feature is overridden, then the source path for the file would be relative to the new directory location.
If instead of downloading the file from the workshop session container, you wanted it to be downloaded from an alternate backend service associated with the workshop session, you can set the url property of both the files:download-file and files:copy-file clickable actions, instead of the path property.
```files:download-file
url: {{ingress_protocol}}::/cluster-{{session_name}}.{{ingress_domain}}/config.yaml
download: {{session_name}}-config.yaml
preview: true
```
When supplying url, because of cross domain restrictions, the hostname must share the same parent domain as the ingress domain Educates is configured to use. If necessary, you could use the ingresses feature of a workshop to set up a proxy to a distinct service which did not share the same parent domain.
Clickable actions for file upload
If file uploads are enabled, the files:upload-file clickable action can be used to upload a single named file.
```files:upload-file
path: kubeconfig.yaml
```
The file to upload should be selected and the upload button clicked. The resulting file will be placed in the uploads directory, which defaults to the uploads subdirectory of the workshop user’s home directory. The name of the file after being uploaded will be that indicated by the path property.
To upload a set of arbitarily named files, the files:upload-files clickable action can be used instead.
```files:upload-files
```
All the files selected for upload will be placed in the uploads directory, with names the same as the originals from the local machine.
Clickable actions for the examiner
If the test examiner is enabled, special actions are available which can be used to run verification checks to determine if a workshop user has performed a required step. These verification checks can be triggered by clicking on the action, or they can optionally be configured to automatically start running when the page loads.
For a one off verification check that needs to be clicked on to run, you can use:
```examiner:execute-test
name: test-that-pod-exists
title: Verify that pod named "one" exists.
args:
- one
```
The title field will be displayed as the title of the clickable action and should describe the nature of the test. If required, you can provide a description field for a longer explaination of the test. This will be displayed in the body of the clickable action but will always be shown as preformatted text.
There must exist an executable program (script or compiled application), in the workshop/examiner/tests directory with name matching the value of the name field.
The list of program arguments listed against the args field will be passed to the test program.
The executable program for the test must exit with a status of 0 if the test was successful, and non zero if the test was a failure. The test should aim to return as quickly as possible and should not be a persistent program.
#!/bin/bash

kubectl get pods --field-selector=status.phase=Running -o name | egrep -e "^pod/$1$"

if [ "$?" != "0" ]; then
    exit 1
fi

exit 0
The current working directory of the executable program when run will be the workshop user home directory. It is however recommended that absolute path names be constructed with reference to HOME environment variable as necessary.
By default the program for a test will be killed automatically after a timeout of 15 seconds, and the test deemed as failed. If you need to adjust the timeout, you can set the timeout value. The value is in seconds. A value of 0 will result in the default timeout being applied. It is not possible to disable the killing of the test program if it runs too long.
```examiner:execute-test
name: test-that-pod-exists
title: Verify that pod named "one" exists
args:
- one
timeout: 5
```
If you would like to have the test applied multiple times, you can specify that it should be retried when a failure occurs. For this you need to specify the number of times to retry, and the delay between retries. The value for the delay is in seconds.
```examiner:execute-test
name: test-that-pod-exists
title: Verify that pod named "one" exists
args:
- one
timeout: 5
retries: 10
delay: 1
```
When retries are being used, the testing will be stopped as soon as the test program returns that it was sucessful.
If you want to have retries go on for as long as the page of the workshop instructions is displayed, you can set retries to the special YAML value of .INF.
```examiner:execute-test
name: test-that-pod-exists
title: Verify that pod named "one" exists
args:
- one
timeout: 5
retries: .INF
delay: 1
```
If instead of the test being run in the context of the workshop container using the supplied script, you wanted the check performed by a separate backend service associated with the workshop session, you can supply a url property instead. It is up to that service to implement the functionality to perform the test.
```examiner:execute-test
name: test-that-pod-does-not-exist
title: Verify that pod named "one" does not exist
url: {{ingress_protocol}}::/examiner-{{session_name}}.{{ingress_domain}}/test-that-pod-does-not-exist
args:
- {{session_name}}
```
When supplying url, because of cross domain restrictions, the hostname must share the same parent domain as the ingress domain Educates is configured to use.
Where user input is required for a test, it is possible to specify a set of input parameters using the inputs section.
```examiner:execute-test
name: deploy-application
prefix: Task
title: Deploy application
inputs:
  schema:
    name:
      type: string
      title: "Name:"
      default: "my-app"
      required: true
    replicas:
      type: integer
      title: "Replicas:"
      default: "1"
      required: true
  form:
  - "*"
  - type: submit
    title: Deploy
```
The format of data provided by the inputs section is as dictated by the jsonform package used to render the HTML form. Note that not all HTML form input types can be used. For example, this cannot be used for file uploads and the separate clickable actions for file uploads should be used instead. Also, not all features of the jsonform package may be usable. For example, you cannot use features which require the provision of Javascript code.
Although originally intended for implementing tests to see if a workshop user has successfully carried out prior tests, the use of inputs enables this mechanism to also be used for a quiz, to collect inputs which could then be used in subsequent steps of the workshop, or for more complicated scripted tasks requiring input.
Note that using the ability to automatically start a test when the page of instructions is loaded or a section expanded, should not be used for those where user input is required as it would deprive the user of the ability to provide the inputs.
Clickable actions for sections
For instructions which are optional, or which you want to hide until the workshop user is ready to do that part of the instructions, you can designate sections which initially will be collapsed and hidden. Clicking on the action for the section will expand the content of that section. This might be used for example to initially hide a set of questions or a test at the end of each page for workshop instructions.
In order to designate the section of content to initially be hidden you need to use two separate action code blocks marking the beginning and end of the section.
```section:begin
title: Questions
```

To show you understand ...

```section:end
```
The title should be set to the text you want included in the banner for the clickable action.
A clickable action will only be shown for the beginning of the section and that for the end will always be hidden. Clicking on the action for the begining will expand the section. The section can be collapsed again by clicking on the action.
If desired, it is possible to create nested sections but you should name the action blocks for the beginning and end so they can be correctly matched.
```section:begin
name: questions
title: Questions
```

To show you understand ...

```section:begin
name: question-1
prefix: Question
title: 1
```

...

```section:end
name: question-1
```

```section:end
name: questions
```
The prefix attribute allows you to override the default Section prefix used on the title for the action.
If a collapsible section includes an examiner action block and it is set to automatically run, it will only start when the collapsible section is expanded.
In case you want a section header showing in the same style as other clickable actions, you can use:
```section:heading
title: Questions
```
Clicking on this will still mark the action as having been completed, but will not actually trigger any other action.
Automatically triggering actions
Rather than require a workshop user to click on a clickable action, you can have the action triggered automatically as soon as the page is loaded, or when a section it is contained in is expanded, by setting autostart to true.
For example, if using the clickable action for examiner tests, you could use:
```examiner:execute-test
name: test-that-pod-exists
title: Verify that pod named "one" exists
args:
- one
timeout: 5
retries: .INF
delay: 1
autostart: true
```
When a test succeeds, if you want to have the next clickable action in the same page automatically triggered, you can set cascade to true. This could be another test as shown or any other clickable action.
```examiner:execute-test
name: test-that-pod-exists
title: Verify that pod named "one" exists
args:
- one
timeout: 5
retries: .INF
delay: 1
autostart: true
cascade: true
```

```examiner:execute-test
name: test-that-pod-does-not-exist
title: Verify that pod named "one" does not exist
args:
- one
retries: .INF
delay: 1
```
Overriding action cooldown period
For the majority of clickable actions a cooldown period is applied of 3 seconds. This means one is blocked from clicking on the same clickable action a second time until the cooldown period has expired. This is intended to avoid problems caused by accidental double clicks.
This cooldown period can be overridden if it is desired to block a user from using the clickable action again for a longer period of time, by setting the cooldown property. The value of the period should be in seconds. One can also use the special value .INF if wanting to block it from being clicked a second time.
```examiner:execute-test
name: test-that-pod-exists
title: Verify that pod named "one" exists.
cooldown: .INF
args:
- one
```
Note that reloading of the web page holding the instructions will reset the cooldown period and the clickable action will be able to be used again.
Hiding clickable actions from view
With the exception of the clickable action representing the end of a collapsable section, and clickable actions nested within sections (while the section is collapsed), they are always visible and thus can be clicked on by users.
In the case of a top level action enabling the autostart field, when the page is loaded it will be automatically triggered as if it had been clicked by the user. Similarly, an action enabling the autostart field nested within a section will be triggered when the section is expanded. An action which follows another which has set cascade will also be triggered when the prior action successfully completed.
In situations where actions are being automatically triggered rather than relying on the user clicking on the action, it may be desirable to hide the action and not display it. This can be done by setting the hidden field within any clickable actions which accepts YAML in the body of the action block.
This could for example be used to ensure a dashboard tab is created and given focus whenever a page is loaded.
```dashboard:reload-dashboard
name: Example
url: https://www.example.com/
autostart: true
hidden: true
```
It is also possible to use the hidden field to have text only be made visible once a prior cascading action completes, without the collapsable section being visible, by setting hidden on the clickable action for the start of the section.
```section:begin
hidden: true
```

Text.

```section:end
```
Generating events for actions
For any clickable action which accepts YAML in the body of the action block, you can specify that an analytics event should be generated and delivered to the registry analytics webhook if the action is clicked. This is indicated by adding an event field.
```dashboard:open-url
url: https://www.example.com/
event: "open-example-web-site"
```
The value of the event field can be a literal value such as a string, or an object defining nested properties.
```dashboard:open-url
url: https://www.example.com/
event:
  name: "dashboard:open-url"
```
It is up to you as to what to set the event field to based on what your system for handling the events can handle.
The type of the analytics event delivered by the webhook will be Action/Event.
Overriding title and description
Clickable action blocks will default to using a title with prefix dictated by what the action block does. The body of the action block will also default to using a value commensurate with the action.
Especially for complicated scenarios involving editing of files the defaults may not be the most appropriate and be confusing, so you may want to override them.
In order to do this you can set the prefix, title and description fields of a clickable action block.
```action:name
prefix: Prefix
title: Title
description: Description
```
The banner of the action block in this case would be displayed as “Prefix: Title”, with the body showing “Description”.
Note that the description will always be displayed as pre-formatted text style within the rendered page.
Escaping of code block content
When using the classic renderer, the Liquid template engine is applied to workshop content. If it is necessary to escape content in code blocks which conflicts with the syntactic elements of the Liquid template engine, to escape such elements you will need to suspend processing by the template engine for that section of workshop content to ensure it is rendered correctly. This can be done using a Liquid {% raw %}...{% endraw %} block.
{% raw %}
```execute
echo "Execute command."
```
{% endraw %}
This will have the side effect of preventing interpolation of data variables, so restrict it to only the scope you need it.
When using the hugo renderer, if the syntax for Hugo short codes conflicts with what you need to display in a code block, you need to add C style comments inside of the shortcode delimeters.
```
{{</* highlight python */>}}
  if hello:
    print("World")
{{</* /highlight */>}}
```
Interpolation of data variables
When creating page content, you can reference a number of pre-defined data variables. The values of the data variables will be substituted into the page when rendered in the users browser.
The workshop environment provides the following built-in data variables for use in workshop instructions.
assets_repository- The host name of the workshop environment assets repository when enabled.cluster_domain- The internal domain used by the Kubernetes cluster, usuallycluster.local.config_password- A unique random password value for use when accessing the workshop session configuration.environment_name- The name of the workshop environment.image_repository- The host name of the image repository associated with the cluster or training portal for image storage.ingress_class- The ingress class which Educates is configured to use for all ingress.ingress_domain- The domain which should be used in the any generated hostname of ingress routes for exposing applications.ingress_port- The port number for the workshop session ingress, usually port 80 or 443, but for docker deployment can be different.ingress_port_suffix- The port number (with colon prefix) for the workshop session ingress. Will however be empty when standard ports of 80 or 443.ingress_protocol- The protocol (http/https) that is used for ingress routes which are created for workshops.kubernetes_api_url- When session has access to a Kubernetes cluster, the URL for accessing the Kubernetes API. This is only valid when used from the workshop terminal.kubernetes_ca_crt- When session has access to a Kubernetes cluster, the contents of the public certificate required when accessing the Kubernetes API URL.kubernetes_token- When session has access to a Kubernetes cluster, the Kubernetes access token of the service account that the workshop session is running as.oci_image_cache- The hostname of the workshop environment OCI image cache when enabled.pathway_name- The name of the pathway for workshop instructions when in use.platform_arch- The CPU architecture the workshop container is running on,amd64orarm64.policy_engine- The name of the security policy engine applied to workshops, usuallykyverno.policy_name- When session has access to a Kubernetes cluster, the name of the security policy restricting the type of workloads that can be deployed.services_password- A unique random password value for use with arbitrary services deployed with a workshop.session_hostname- The host name of the workshop session instance.session_id- The short identifier for the workshop session. Is only unique in the context of the associated workshop environment.session_name- The name of the workshop session. Is unique within the context of the Kubernetes cluster the workshop session is hosted in.session_namespace- When session has access to a shared Kubernetes cluster, the name of the namespace the workshop instance is linked to and into which any deployed applications will run.session_url- The full URL for accessing the workshop session instance dashboard.ssh_private_key- The private part of a unique SSH key pair generated for the workshop session.ssh_public_key- The public part of a unique SSH key pair generated for the workshop session.storage_class- The storage class which Educates is configured to use for all storage.training_portal- The name of the training portal the workshop is being hosted by.workshop_description- The description of the workshop from the workshop definition.workshop_name- The name of the workshop.workshop_namespace- The name of the namespace used for the workshop environment.workshop_title- The title of the workshop from the workshop definition. May be overridden when a specific pathway through the workshop instructions is selected.
Note that session_name was only added in Educates version 2.6.0. In prior versions session_namespace was used as a general identifier for the name of the session when in practice it identified the name of the namespace the workshop instance had access to when it was able to make use of the same Kubernetes cluster the workshop instance was deployed to. Since Educates supports configurations where there is no access to a Kubernetes cluster, or a distinct Kubernetes cluster was used with full admin access, the naming made no sense so session_name was added. As such, if needing an identifier for the name of the session, use session_name. Only use session_namespace when needing to refer to the actual namespace in a Kubernetes cluster which the session may be associated with. Although the values of each are currently the same, in the future session_namespace will at some point start to be set to an empty string when there is no associated Kubernetes namespace.
To use a data variable within the page content, when using the classic renderer surround it by matching pairs of brackets:
{{ session_name }}
This can be done inside of code blocks, including clickable actions, as well as in URLs:
```dashboard:open-url
url: http://myapp-{{ session_name }}.{{ ingress_domain }}
```
If using the hugo renderer, you should use the Hugo params shortcode to include the data variable.
{{< param session_name >}}
This similarly can be used in clickable actions.
```dashboard:open-url
url: http://myapp-{{< param session_name >}}.{{< param ingress_domain >}}
```
Note that an older version of the classic rendering engine required that data variables be surrounded on each side with the character %. This is still supported for backwards compatibility when using the classic renderer, but you should now use matched pairs of brackets instead. Support for percentage delimiters may be removed in a future version.
Adding custom data variables
You can introduce your own data variables by listing them in the workshop configuration files.
For the classic renderer this can be done in the workshop/modules.yaml file.
A data variable is defined as having a default value, but where the value will be overridden if an environment variable of the same name is defined.
The field under which the data variables should be specified is config.vars:
config:
    vars:
    - name: NAME
      value: undefined
Where you want to use a name for a data variable which is different to the environment variable name, you can add a list of aliases:
config:
    vars:
    - name: NAME
      value: undefined
      aliases:
      - ALIAS
The environment variables with names given in the list of aliases will be checked first, then the environment variable with the same name as the data variable. If no environment variables with those names are set, then the default value will be used.
The default value for a data variable can be overridden for a specific workshop by setting it in the corresponding workshop file. For example, workshop/workshop-python.yaml might contain:
vars:
    NAME: python
If you need more control over setting the values of data variables, you can provide the file workshop/config.js. The form of this file should be:
function initialize(workshop) {
    workshop.load_workshop();

    if (process.env['WORKSHOP_FILE'] == 'workshop-python.yaml') {
        workshop.data_variable('NAME', 'python');
    }
}

exports.default = initialize;

module.exports = exports.default;
This Javascript code will be loaded and the initialize() function called to load the workshop configuration. You can then use the workshop.data_variable() function to set up any data variables
Because it is Javascript, you can write any code you need to query process environment variables and set data variables based on those. This might include creating composite values constructed from multiple environment variables. You could even download data variables from a remote host.
For the hugo renderer, extra custom data variables can be specified in the workshop/config.yaml file. These can go at global scope within the configuration file:
params:
- name: NAME
  value: undefined
  aliases:
  - ALIAS
and can also be nested under the configuration for a specific pathway.
pathways:
  default: python

  paths:
    python:
      title: "Python"

      params:
      - name: NAME
        value: python
Passing of environment variables
The passing of environment variables, including remapping of variable names, can be achieved by setting your own custom data variables. If you are using the classic renderer and don’t need to set default values, or remap the name of an environment variable, you can instead reference the name of the environment variable directly, albeit that you must prefix the name with ENV_ when using it.
For example, if you wanted to display the value of the KUBECTL_VERSION environment variable in the workshop content, you can use ENV_KUBECTL_VERSION, as in:
{{ ENV_KUBECTL_VERSION }}
Do note that only environment variables set on the workshop container from the workshop definition, or environment variables set and exported from profile.d scripts are available when rendering workshop instructions. Any environment variables set in workshop/profile are not available as that file only affects the interactive terminal.
If using the hugo renderer there is no builtin equivalent for this feature, although you could provide your own shortcode for Hugo to use which implements it if desired.
Handling of embedded URL links
URLs can be included in workshop content. This can be the literal URL, or the Markdown or AsciiDoc syntax for including and labelling a URL. What happens when a user clicks on a URL, will depend on the specific URL.
In the case of the URL being an external web site, when the URL is clicked, the URL will be opened in a new browser tab or window.
When the URL is a relative page referring to another page which is a part of the workshop content, the page will replace the current workshop page.
You can define a URL where components of the URL are provided by data variables. Data variables useful in this content are session_name and ingress_domain as they can be used to create a URL to an application deployed from a workshop. If using the classic renderer this can be done using:
https://myapp-{{ session_name }}.{{ ingress_domain }}
If using the hugo renderer this can be done using:
https://myapp-{{< param session_name >}}.{{< param ingress_domain >}}
In the case of setting up the workshop instance to act as a proxy for a web application, you would also need to use the ingress_protocol data variable, which will be the HTTP protocol scheme used for accessing the workshop session.
{{< param ingress_protocol >}}://myapp-{{< param session_name >}}.{{< param ingress_domain >}}
This is necessary as it will be the Educates installation which will dictate whether https or plain http would be used and as a workshop author you would not know in advance.
Conditional rendering of content
When using the classic renderer, because rendering of pages is in part handled using the Liquid template engine, you can also use any constructs the template engine supports for conditional content.
{% if LANGUAGE == 'java' %}
....
{% endif %}
{% if LANGUAGE == 'python' %}
....
{% endif %}
When using the hugo renderer, because Hugo doesn’t support a standard way of handling conditionals, it is necessary to use custom shortcodes.
To facilitate including conditional content based on the workshop instructions pathway being used, Educates provides a shortcode to select based on the pathway name.
{{< pathway python >}}
....
{{< /pathway >}}
{{< pathway java >}}
....
{{< /pathway >}}
If you need conditional sections based on other variables or using more complex logic, you will need to define your own shortcodes. These can be placed in the workshop/layouts/shortcodes directory.
The shortcode for selecting based on the pathway is for example implemented as:
{{ if eq $.Page.Site.Params.pathway_name (.Get 0) }}
{{- .Inner | markdownify }}
{{ end }}
Adding admonitions with shortcodes
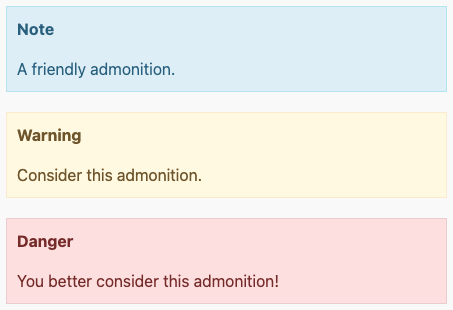
Since Educates v2.6.0, a range of custom admonitions is supported when using the hugo renderer. Currently, three types of admonitions exist:
note - rendered as blue text box
warning - rendered as yellow text box
danger - rendered as red text box
The shortcodes can be used like this, with the respective admonition name as shortcode:
{{< note >}}
A friendly admonition.
{{< /note >}}

{{< warning >}}
Consider this admonition.
{{< /warning >}}

{{< danger >}}
You better consider this admonition!
{{< /danger >}}
The rendered version looks like this:
More information on shortcodes can be found in the Hugo documentation.
Embedding custom HTML content
Custom HTML can be embedded in the workshop content using the appropriate mechanism provided by the content rendering engine being used.
If using the classic renderer and Markdown, HTML can be embedded directly with no requirement for it to be marked as HTML.
Lorem ipsum dolor sit amet, consectetur adipiscing elit. Proin justo.

<div>
<table style="width:100%">
  <tr>
    <th>Firstname</th>
    <th>Lastname</th>
    <th>Age</th>
  </tr>
  <tr>
    <td>Jill</td>
    <td>Smith</td>
    <td>50</td>
  </tr>
  <tr>
    <td>Eve</td>
    <td>Jackson</td>
    <td>94</td>
  </tr>
</table>
</div>

Lorem ipsum dolor sit amet, consectetur adipiscing elit. Proin justo.
If using the classic renderer and AsciiDoc, HTML can be embedded by using a passthrough block.
Lorem ipsum dolor sit amet, consectetur adipiscing elit. Proin justo.

++++
<div>
<table style="width:100%">
  <tr>
    <th>Firstname</th>
    <th>Lastname</th>
    <th>Age</th>
  </tr>
  <tr>
    <td>Jill</td>
    <td>Smith</td>
    <td>50</td>
  </tr>
  <tr>
    <td>Eve</td>
    <td>Jackson</td>
    <td>94</td>
  </tr>
</table>
</div>
++++

Lorem ipsum dolor sit amet, consectetur adipiscing elit. Proin justo.
If using the hugo renderer, it provides as standard various shortcodes for embedding different custom HTML snippets, such as embedding videos or images. If you have a custom requirement of your own, you will need to provide your own shortcode by placing it in the workshop/layouts/shortcodes directory and referencing that in your instructions.
In all cases it is recommended that the HTML consist of only a single HTML element. If you have more than one, include them all in a div element. The latter is necessary if any of the HTML elements are marked as hidden and the embedded HTML will be a part of a collapsible section. If you don’t ensure the hidden HTML element is placed under the single top level div element, the hidden HTML element will end up being made visible when the collapsible section is expanded.
In addition to visual HTML elements, you can also include elements for embedded scripts or style sheets.
If using the classic render and have HTML markup which needs to be added to multiple pages, extract it out into a separate file and use the include file mechanism of the Liquid template engine. You can also use the partial render mechanism of Liquid as a macro mechanism for expanding HTML content with supplied values.
Triggering actions from Javascript
Clickable actions can be embedded in workshop instructions and reduce the manual steps that workhop users need to perform. If further automation is required, a subset of the underlying tasks which can be triggered through clickable actions can be executed from Javascript code embedded within the workshop instructions page. This can be used for tasks such as ensuring that a dashboard tab is made visible immediately a page in the workshop instructions is viewed.
If using the classic renderer and Markdown, the Javascript can be embedded directly within the Markdown document.
<script>
window.addEventListener("load", function() {
    educates.expose_dashboard("Editor");
});
</script>
If using the classic renderer and AsciiDoc, HTML can be embedded by using a passthrough block.
++++
<script>
window.addEventListener("load", function() {
    educates.expose_dashboard("Editor");
});
</script>
++++
If using the hugo renderer you will need to provide your own shortcode for embedding custom Javascript into a page by placing it in the workshop/layouts/shortcodes directory and referencing that in your instructions.
All accessible functions are defined within the scope of the educates object. The available API is described by:
interface API {
    paste_to_terminal(text: string, session: string): void
    paste_to_all_terminals(text: string): void
    execute_in_terminal(command: string, session: string, clear: boolean): void
    execute_in_all_terminals(command: string, clear: boolean): void
    clear_terminal(session: string): void
    clear_all_terminals(): void
    interrupt_terminal(session: string): void
    interrupt_all_terminals(): void
    expose_terminal(session: string): boolean
    expose_dashboard(name: string): boolean
    create_dashboard(name: string, url: string): boolean
    delete_dashboard(name: string): boolean
    reload_dashboard(name: string, url?: string): boolean
}

export educates: API
Web pages or separate web sites embedded within a tab of the dashboard can access functionality of a subset of clickable actions by posting Javascript messages to the parent of the iframe for the dashboard tab.
<script>
function doit() {
    parent.postMessage({action: "dashboard:open-dashboard", data: { name: "Editor"}}, "*")
}
</script>

<button onclick="doit()">Click me</button>
Names for actions which can be targeted are the same as the clickable actions used in the workshop instructions. The name of the action is supplied via the action property of the message. Arguments for the clickable action are supplied via the data property. The actions available through the Javascript message mechanism are as follows:
terminal:executeterminal:execute-allterminal:clearterminal:clear-allterminal:interruptterminal:interrupt-allterminal:inputdashboard:expose-terminaldashboard:open-dashboarddashboard:create-dashboarddashboard:delete-dashboarddashboard:reload-dashboard
As well as there being handlers corresponding to a subset of the clickable actions, handlers are also provided for:
dashboard:preview-imagedashboard:finished-workshopdashboard:terminate-session
These can be triggered in order to display popups for previewing an image, or ending the workshop session.
The only Javascript messages which will be processed are those originating from web pages served from the workshop session URL origin, or embedded web sites for which the URL origin is the same as what the dashboard tab was originally opened against. If a workshop user traverses to a different web site within the context of a dashboard tab and it posts a Javascript message, it will be ignored.